|
SEAVAX™ - 1/20th SCALE ALLOY HULL BUILD
|
|||||||||||||||||||||||||||||||||||||||||||||||||||||||||||||||||||||||||||||||||||||||||||||||||||||||||||||||||||||||||||||||||||||||||||||||||||||||||||||
|
OCEAN ENTERPRISE 1 - ALLOY HULL FABRICATION
The Ocean Enterprise MK1, is a 1:20 scale fully functional model of a proposed autonomous, solar powered (small) ship that is designed to vacuum up plastic from the sea. The main hull and much of the superstructure is made from aluminium.
Aluminium is everywhere.
It’s the third most abundant element on planet earth after oxygen and silicon.
Its low density and strength, coupled with its outstanding resistance to corrosion, make it one of the most useful metals we have.
Aluminium and its alloys are essential to the aerospace and construction industries.
These days aluminium is precision cut with lasers or water jets - but not for small scale prototypes. These are built from scratch using tin snips, jigsaws and a sharp pencil.
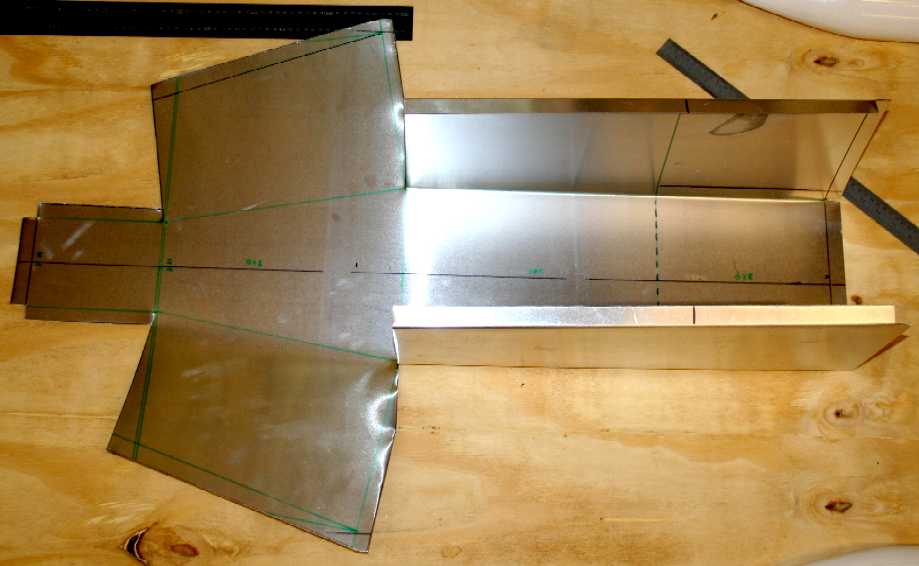
The central hull is a specialized design that had to be fabricated by hand. We are using relatively high strength 1.0mm aluminium sheet, first of all marking out the development accurately (to within half a millimeter) using sharp pencils and coloured markers to code forming sequences. The development is then folded and any bending and cutting deformation will be removed, before the hull can be riveted - when it becomes very much stronger. Welding is possible at this scale using TIG equipment, but this model is not an ocean racer - and is over-strong for the task in any event. A tip here is to always keep panel beating hammers and dollies grease free when working ally. We clean ours with fine carborundum (wet and dry) paper to ensure that any fine rust film from sitting in a damp workshop unused is removed. This is just in case we change our mind and decide we need to weld the ally hull in places.
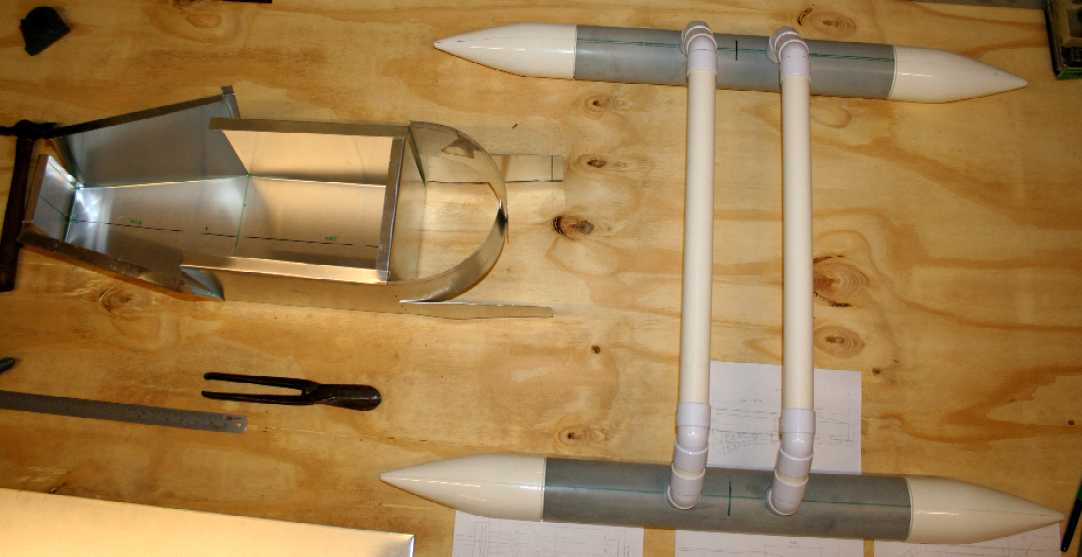
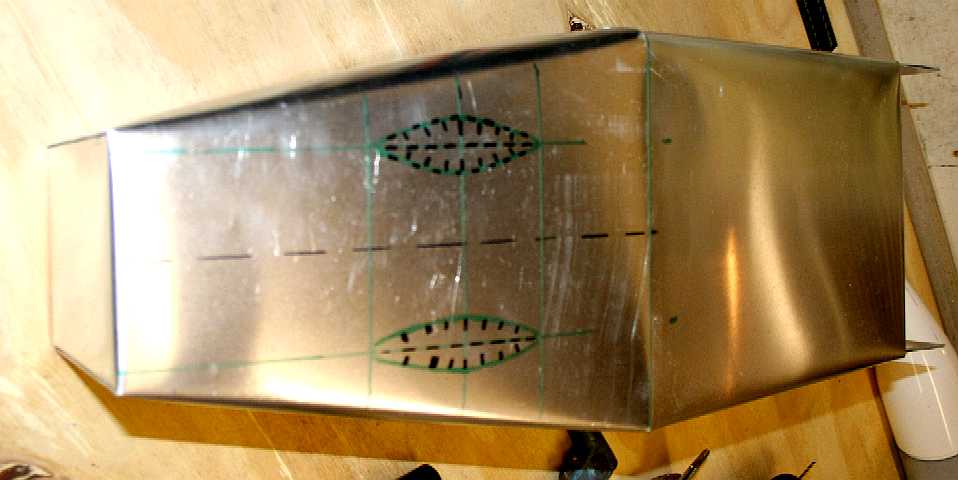
This is very roughly the layout. We will be infilling the poly-pipe cross members with aluminium sheet to prevent lozenging, in the process reducing air drag. It's beginning to look more like one of the Enterprise Star Ships than a giant vacuum cleaner, hence the workshop nickname. Use a thin marking pen, and if you mark a line incorrectly, wipe it off with thinners - unlike the left hand tube shown here. It is confusing to have more than one line to work to. Eliminate as much confusion as possible when fabricating parts, to avoid having to re-measure, again and again. Although, you should always double check measurements before fitting permanently.
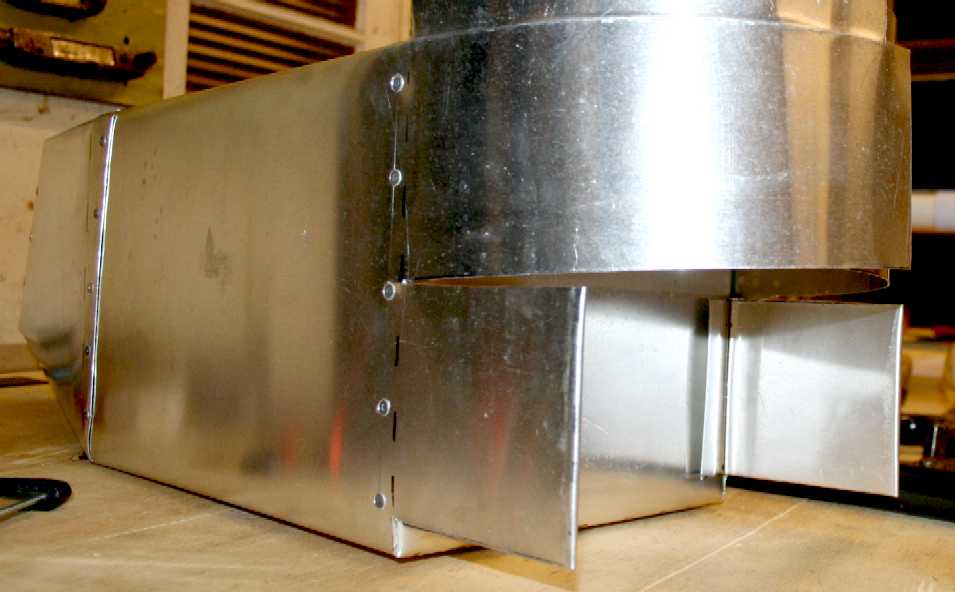
We are fortunate to have a very skilled panel beater on the team. Not many people can make a hull from a single sheet of ally without sharing a few expletives. Why? because it takes a high degree of forward planning. For example, the flat floor of the hull development on the left above, has to be folded upright. But in this picture the rounded hull section above it will not allow that. Also, the forward lower end of this hull has two hinge plates onto which the suction head is to be mounted, so as to be able swivel, to raise and lower the collection head height in the water. It's a bit like origami. But unlike paper folding, there is no give in sheet metal. The two tongues will need to be folded onto themselves (doubled) with a 15mm lip on the inside edge for pop-riveting. Onto/into the double skinned hinge plates will be let a nylon (or similar) bearing.
Here you can see that the leading edge on the right, is now folded up to make a box with returns for riveting. On top of this hull section we will place a beam to join with the front hull cross-member and on top of the beam a deck. In this case a solar deck array. Riveting is another art form if you want watertight joins. Note the Stanley hammer on the far left. It is over 35 years old, and it's still one of the workshop favorites, handed down to us of course.
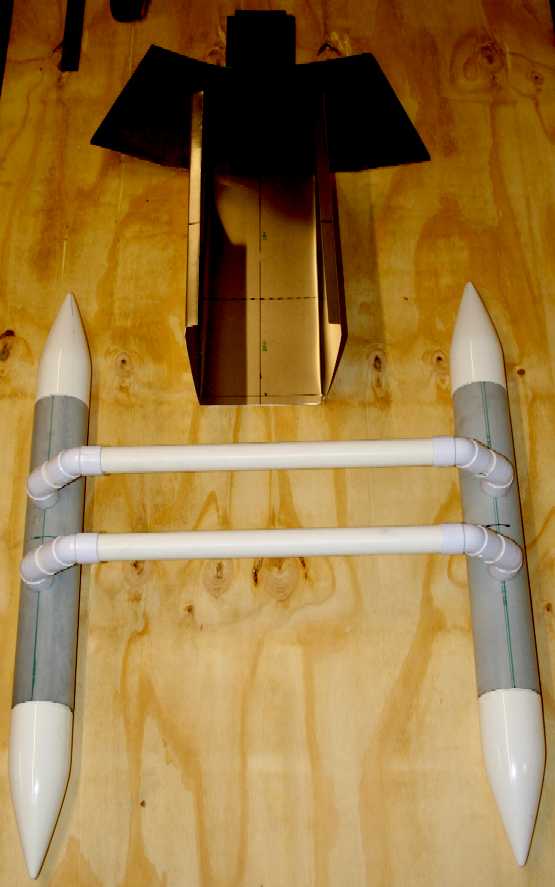
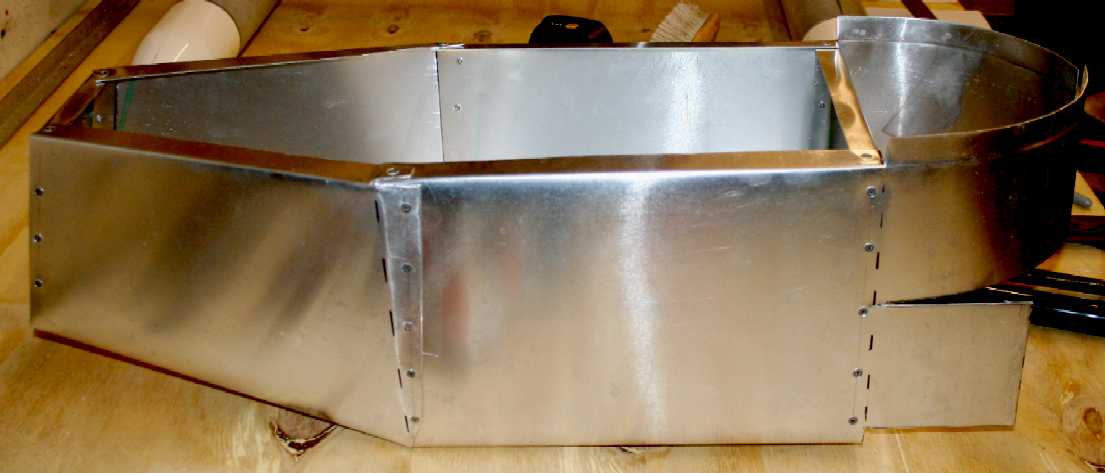
A trimaran for sure, but with two hulls leading and the central hull trailing. Ordinarily, that might be a reasonably low drag hull. But, put the vacuum scoop in between the leading hulls, and the drag will be substantial. At the moment, apart from being a tight fit, there is nothing to stop lozenging of the poly-pipe cross members, since the saddles onto which the ends fit, are round. Note the drawings in the picture above. Boat builders must be able to read and understand drawings, or they'd not be able to work as a team. We recommend AutoCad to produce the drawings for lofting, for it's speed and simplicity. Lofting is the process of drawing out a shape full size, for cutting.
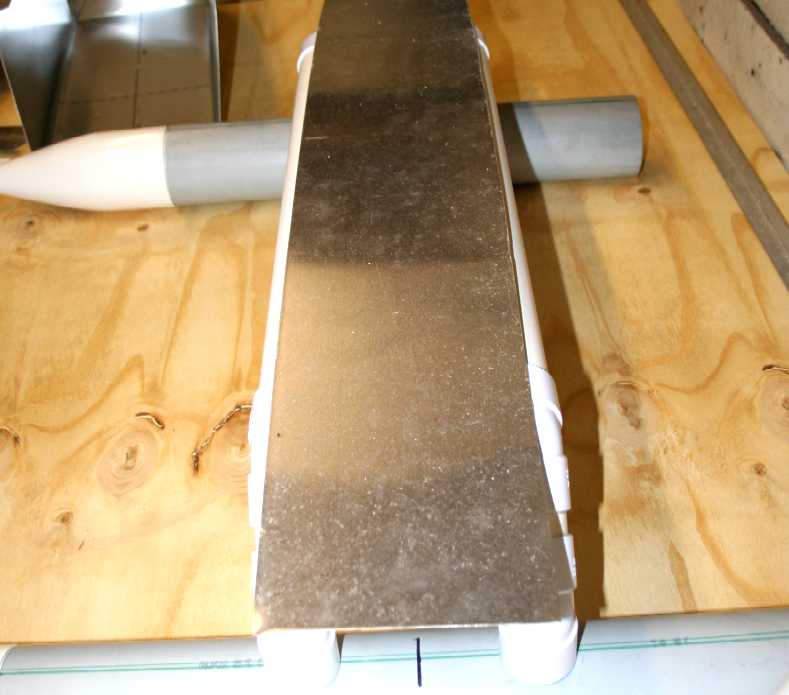
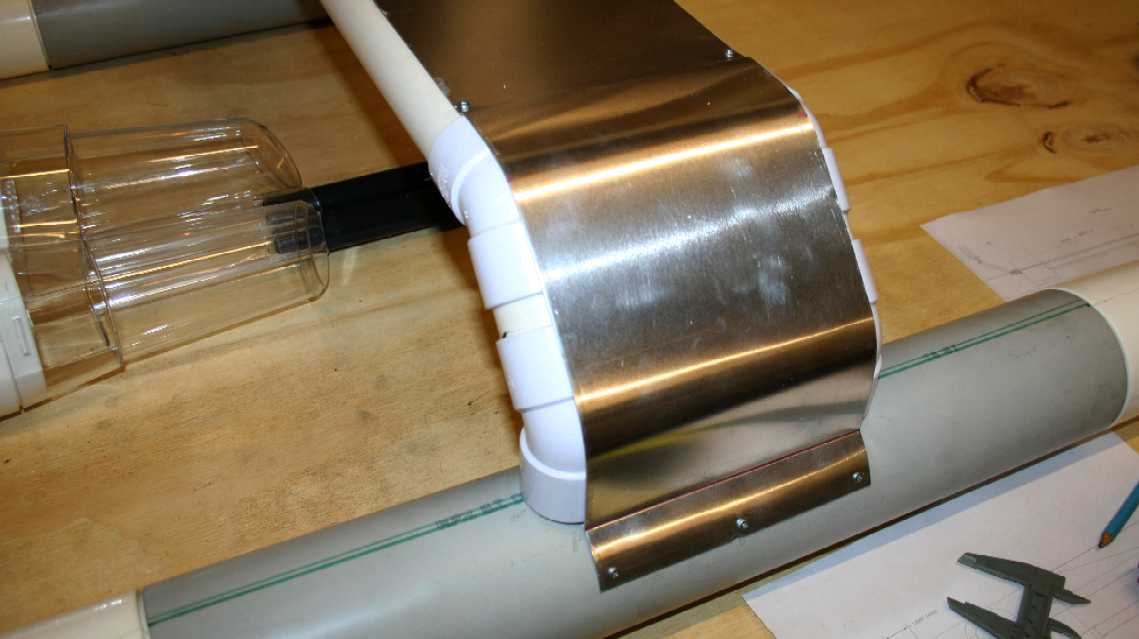
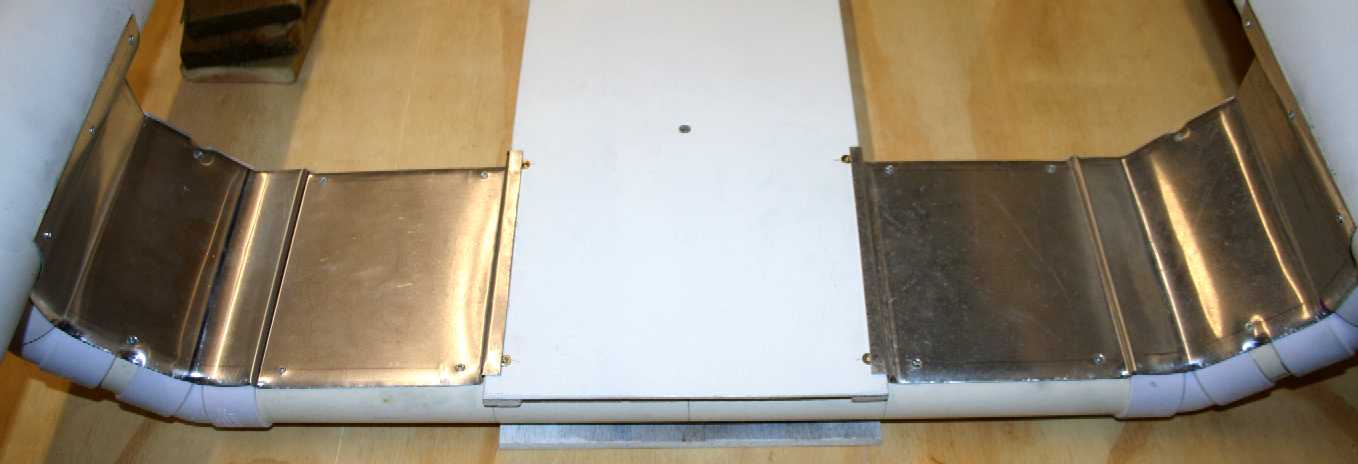
To prevent lozenging, and to reduce air drag, we are fairing in the ABS piping with aluminium sheet. The ally sheet will be riveted or screwed to the plastic tubing and panel beaten to make a sure fit. Whether cutting aluminium with tin snips or a jigsaw, make sure the cut edge is straight, even if it means filing or shaving the edge to remove undulations. Concentrate when cutting, to get a straight line. Take pride in your work. Note how plain the raw ally sheet above looks at the start.
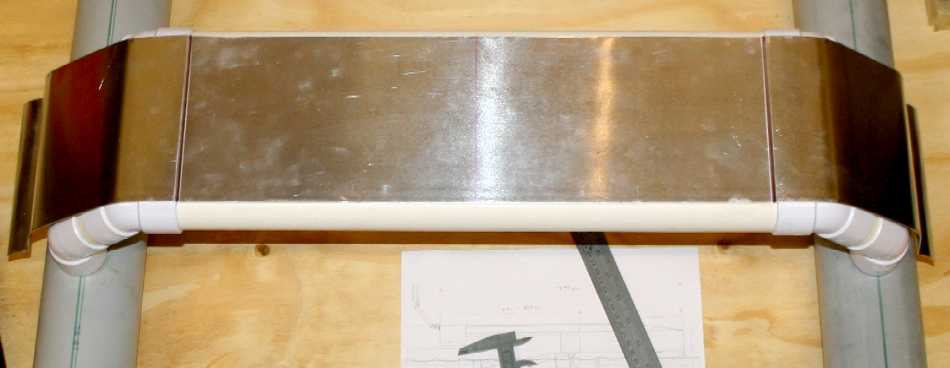
A plain flat sheet section soon begins to shine as it is folded and nips and tucks put in. Once again, the secret here is accurate marking and a good eye. For ninety degree bends (as in the 3mm step seen here) we used two pieces of angle iron in a vice. Clamp the sheet in between the angle iron at the marked line and bend using a flat block of wood. Large diameter steel tubing is used to create the curves for the forty-five degree angles. The aluminium must fit well before it is fixed. Make any adjustments before attempting to secure to the ABS pipe.
We used five 12mm x 3mm screws on each side, rather than rivets here, to be on the safe side. Drill a 1.5mm hole in the ABS and the 3mm screws will self-tap for quite a strong fix. By forming 40mm half rounds, and mating those sections with the sheet shown here - and an underside - we could lose the ABS altogether. We will not though use skilled time making this craft a work of art, just for a feasibility study. The twin cyclonic chambers are seen on the left of this picture.
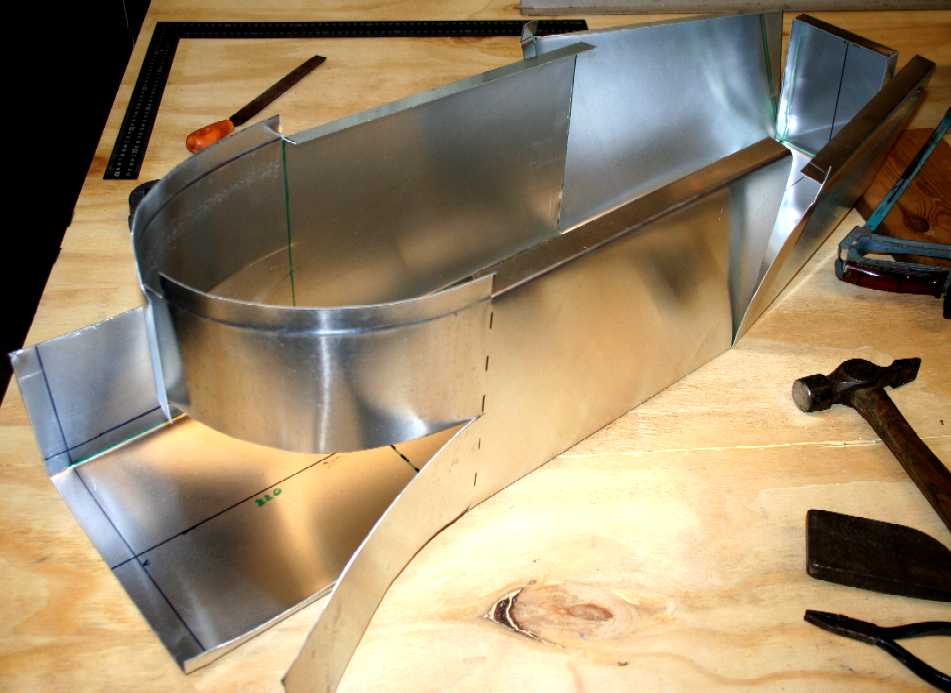
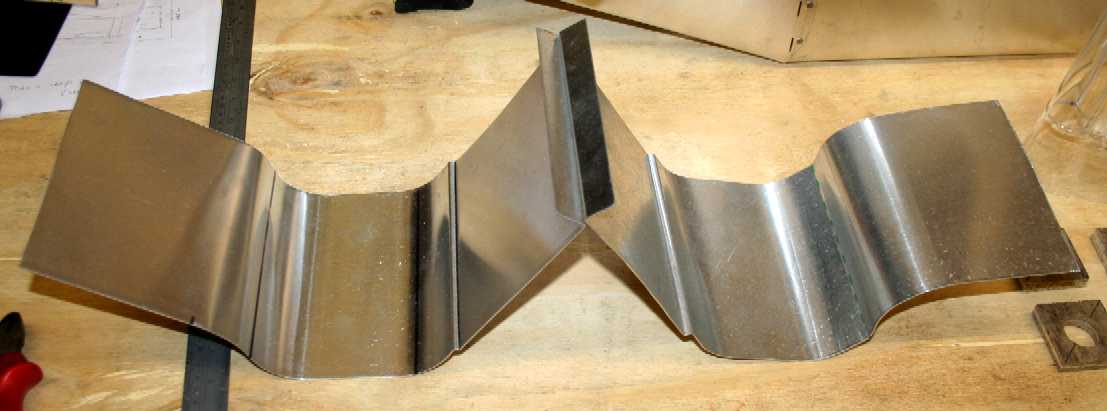
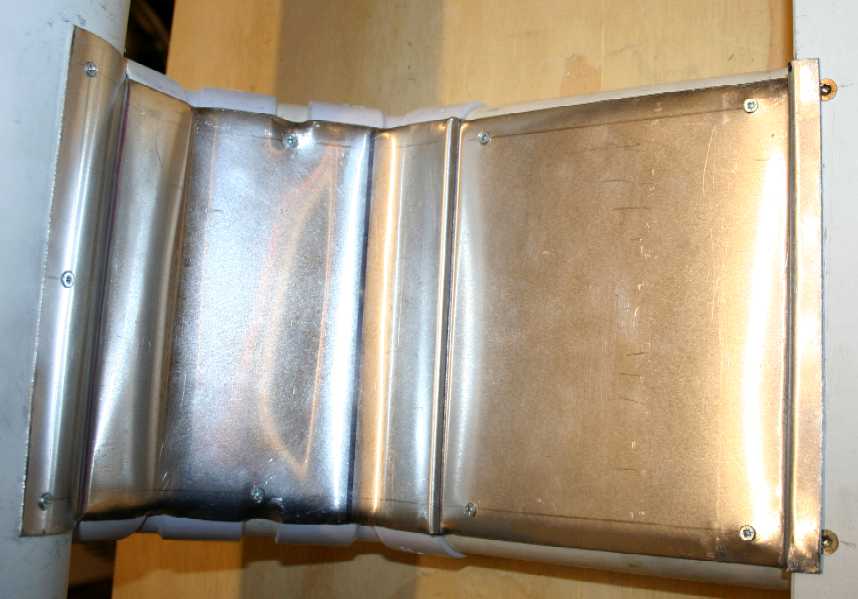
The underside of the trimaran cross-member is also formed from aluminium sheet, but in two pieces - seen above. These panels fit in between the floating forward twin-hulls (sponsons) and the central beam that runs aft to join the rear central hull to make a trimaran. As you can see, each panel has multiple folds consisting of a mixture of tight and smooth curves - but at this stage they are not compound curves. The forward hulls float about 650mm higher than the rear hull, or 32.5mm on the 1/20th scale feasibility study model.
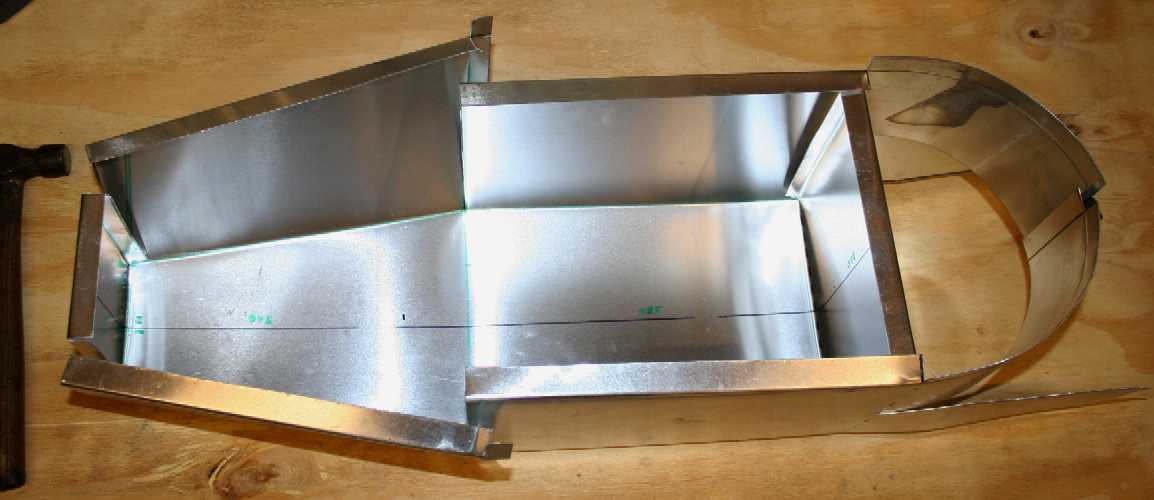
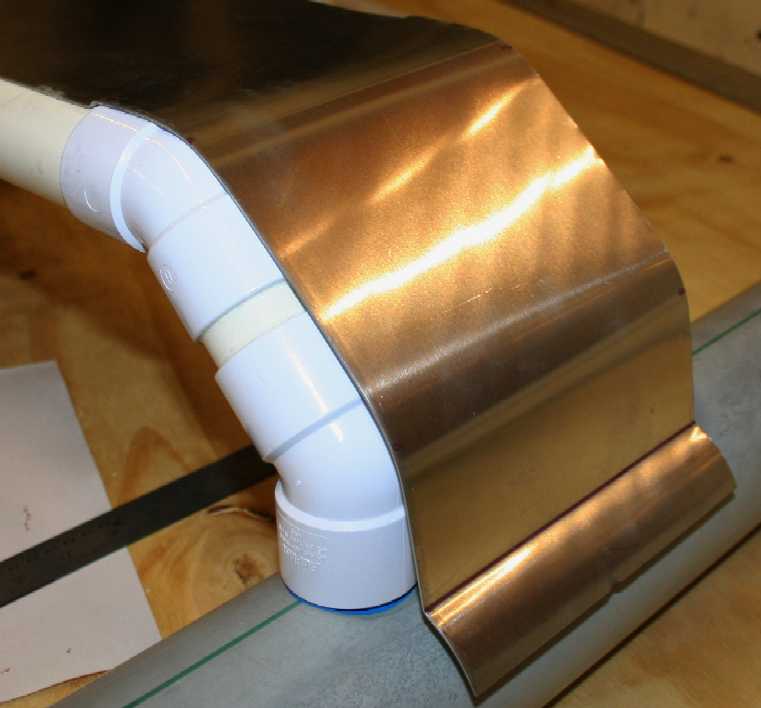
The flat panels are drilled and countersunk then fitted to the poly tubes with nine 12mm x 3mm screws. Once fitted the aluminium can be shaped with a hammer, wood or plastic mallet. This is called planishing. Planishing may be likened to micro, or fine panel beating. Planishing is a hand-driven process used in auto body repair and sheet metal work such as the crafting of medieval armour. Common tools used for planishing include panel beating hammers, slappers, and neck hammers. Heavy rawhide or hardwood hammers are often used. We use a selection of ordinary ball-peen hammers of varying sizes. Care must be taken not to allow sheet metal to work harden and become brittle during planishing. If it does, it must be annealed by heat treating.
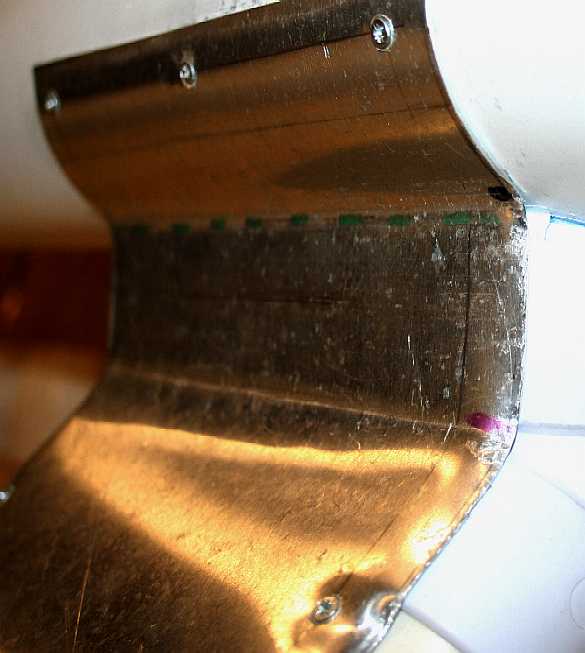
Mirror image: both of the wing undersides fitted. These are not visible once the boat is in the water. You can see that the edges have been planished to form complex compound curves that closely follow the contour of the plastic piping. This not only fairs in the sheet metal but strengthens the structure. The leading deck edge will have a 'U' shaped steel channel that will be screwed to the deck and underside. To this cap we will weld steel flanges that will form the hinge plates for the wind turbine boom. The channel becomes a mounting plate that spreads the point loads from the boom to the deck. If this was made of aluminium it would not be able to withstand the constant battering from high winds - even as a model. The boom and control rods will be an interesting stressing exercise for our marine architects. For the model we're using aluminium square tube 19 x 19 mm for the main booms - and 10 and 16mm round tubes for the uprights and swivels.
MAKING THE ALUMINIUM HULL SECTIONS
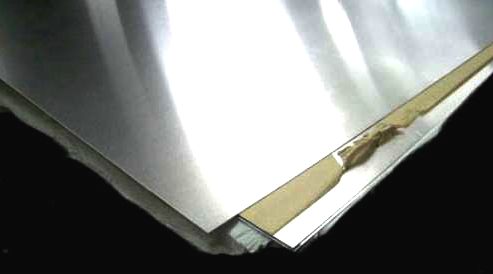
Anyone will tell you that working with aluminium is not easy. It looks easy and the metal cuts quickly, but when it comes to making accurate folds and not marking the metal, that is when experience shows. You will find that aluminium is difficult to weld, without expensive equipment, leaving us little choice but to pop-rivet join the hull of the Ocean Enterprise 1 - on the non-existent budget we have at the moment. Drilling is also a problem, because aluminium swages easily. Use a sharp drill and countersink to reduce swaging. Yup, we're using countersunk, closed head rivets, that are waterproof and were developed for aircraft production. Most DIY pop rivets have a hollow shank that would let water in.
We use Aluminium Warehouse for small ally orders, which company offers a friendly, efficient service within the United Kingdom, and simply superb (sustainable) packaging.
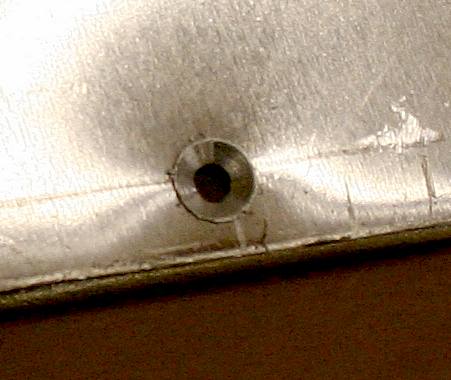
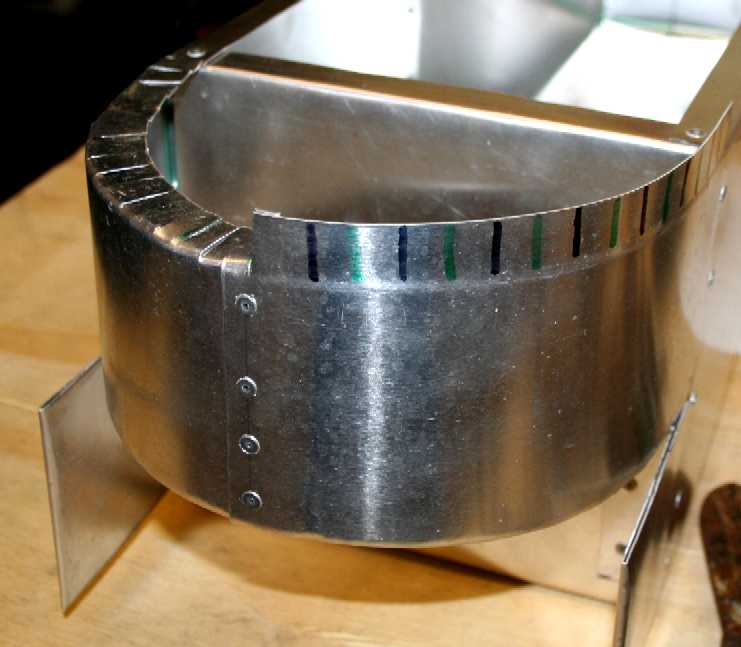
LEFT - Painfully slow, but each rivet hole must be countersunk and deburred. Otherwise, the two aluminium sheets will stand off from one another and not mate tightly. RIGHT - The two forward facing flat plate projections are now bent in two at an angle of 45 degrees, on their way to forming hinge plates for the cyclonic vacuum chambers that sit in the water. We are showing some of the partially formed stages as examples of how things are done, should you fancy building a boat in aluminium.
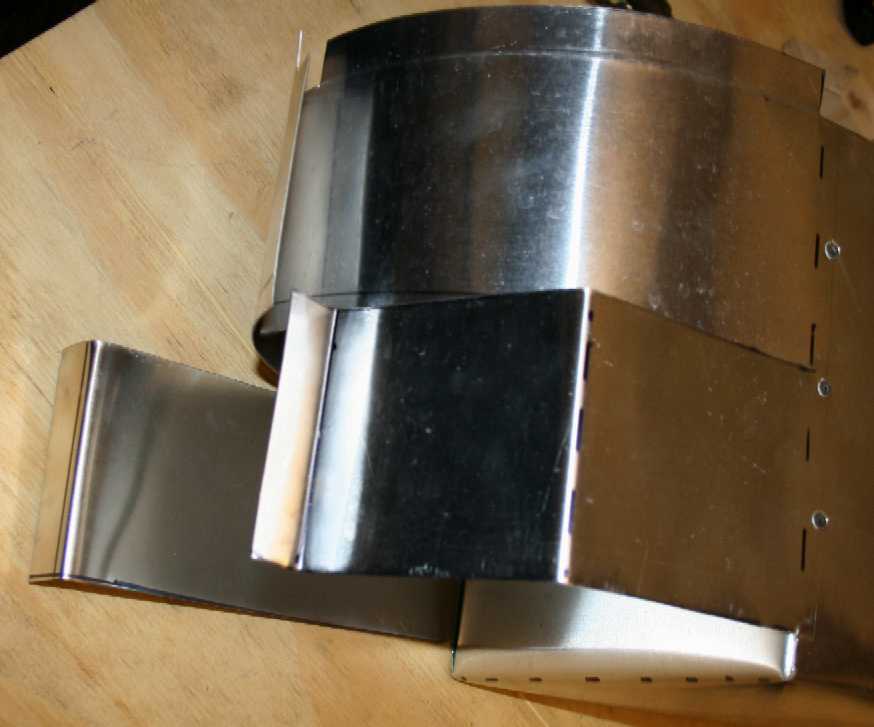
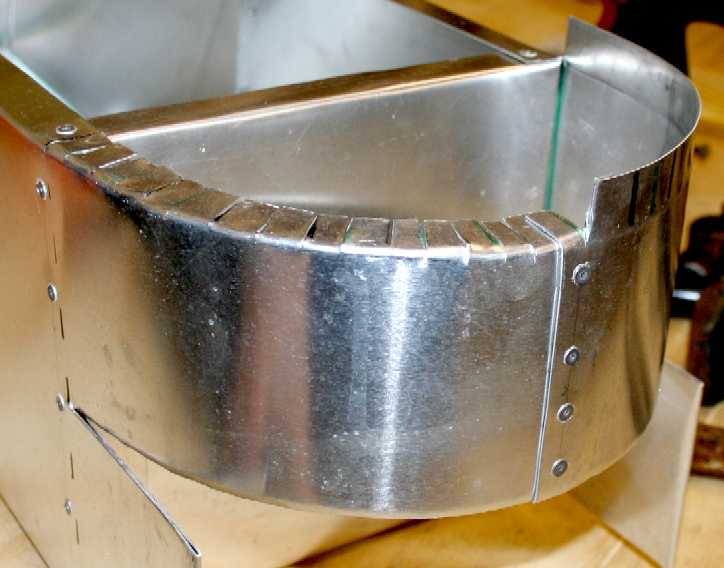
LEFT - To be sure the hull is square, it is best to line up the sections and clamp them in place for when the rivet holes are drilled. RIGHT - The hinge flaps for the vacuum head are now folded back onto the main hull section, ready to be riveted in place.
Here the 'Enterprise 1' is shown all riveted. It looks a bit agricultural, coincidentally, just like a combine harvester body. you might recognize the shape in the AutoCad drawings above. For this experimental model, we have simplified some of the angles and curves. The boat will still work well enough to prove the concept. A reinforcing bridge is to be added to brace the hull rim and keep it square in between servicing (not shown here).
Enterprise 1 - has a bulbous chamber above the swing-head hinges, in which the mechanics that lift and lower the suction head reside. It looks a bit like a wheel arch, and the method of forming is similar, if you don't have a rolling mill. You could spot weld the folded lips and panel beat to make this really smooth. But there will be a deck over the top and we are thinking to screw through a number of the rim flaps to secure the deck. That will mean unscrewing the deck to service the mechanism - no worries.
SUPPORT US - CROWD FUNDING & GRANTS
If you like the work that we are doing here, we would appreciate any financial contribution that you can spare. We are aiming for grant funding as and when such calls might be advertised. But these calls are typically only 60-70% funded, meaning that we will have to find the other 30-40% ourselves. Unfortunately, though we might rid the oceans of plastic and save animal lives - this is not a commercially attractive (highly profitable with short term returns) concept, ruling out banks and venture capitalists as a funding source. We are therefore looking for people who care about wildlife and pure oceans, to give their own money in return for some positive action.
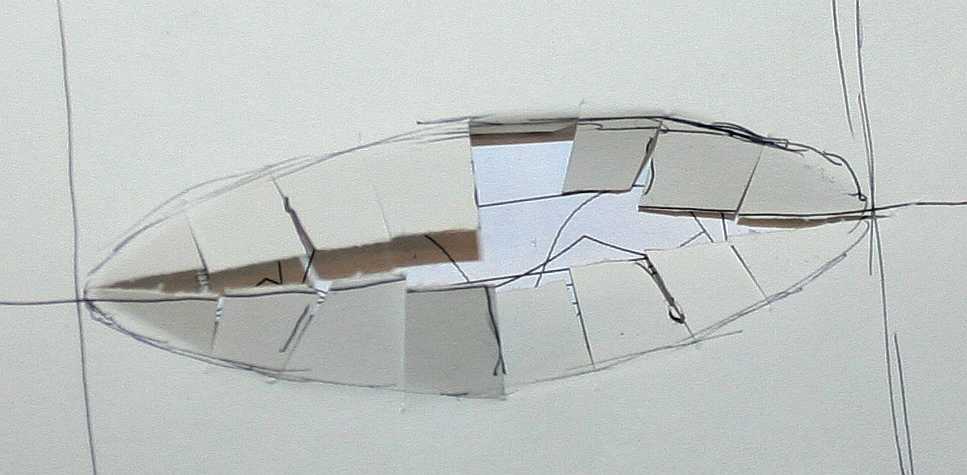
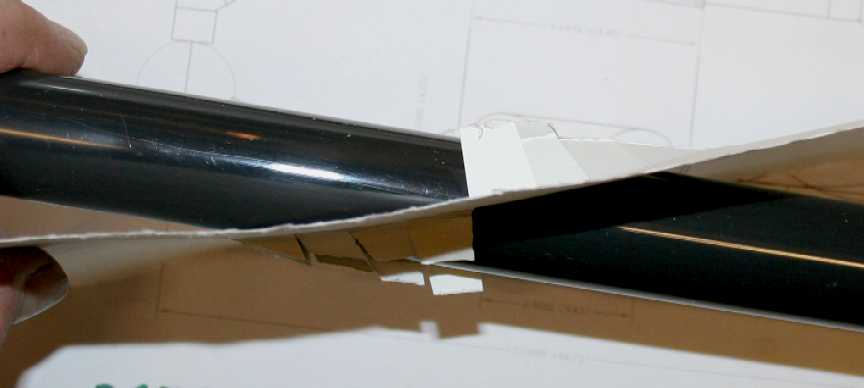
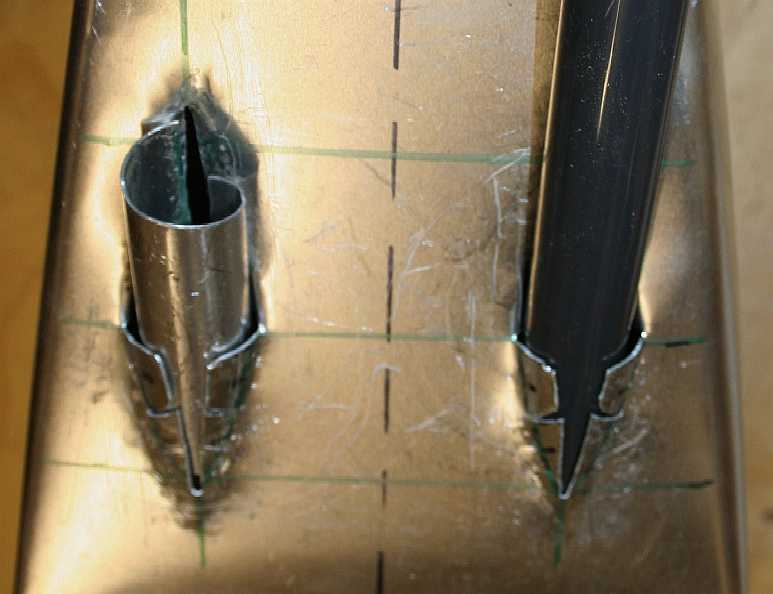
The pump exhaust tubes will exit on the underside of the hull. It is tempting to cut holes where the tubes will go, but don't do that. Simply cut a slot from one end of the marked oval to the other, and then divide each half into smaller aluminium tabs. Tin snips is fine for this task. Then bend the tabs in the aft quadrant upwards and the forward quadrant tabs outwards, or down. Test fit the exhaust tube and form the tabs into a saddle. The tubes will be bonded in place, with support brackets at the rear, near the rudders (not shown yet). See cardboard test piece below. Wait a minute, do we need conventional rudders?
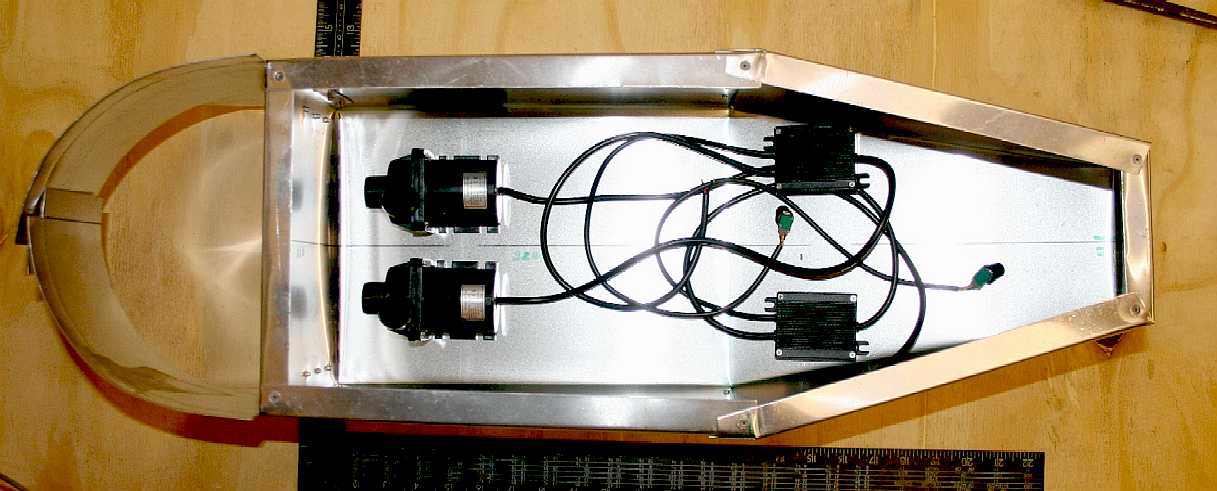
Finally, we get to see where the dc brushless pumps, that drive the hydro cyclones (warp drives) will be fitted. There is plenty of room. The electronic speed controllers must be in a separate waterproof box along with the computers, near the underside of the deck. The hydro cyclone filters are fitted in front of the hull, connected to the pumps via flexible tubes that go through the ally hull forward bulkhead. This allows the suction head to be raised out of the water for inspection and lowered deeper into the water to collect subsurface particles. Picture taken 7-2-15.
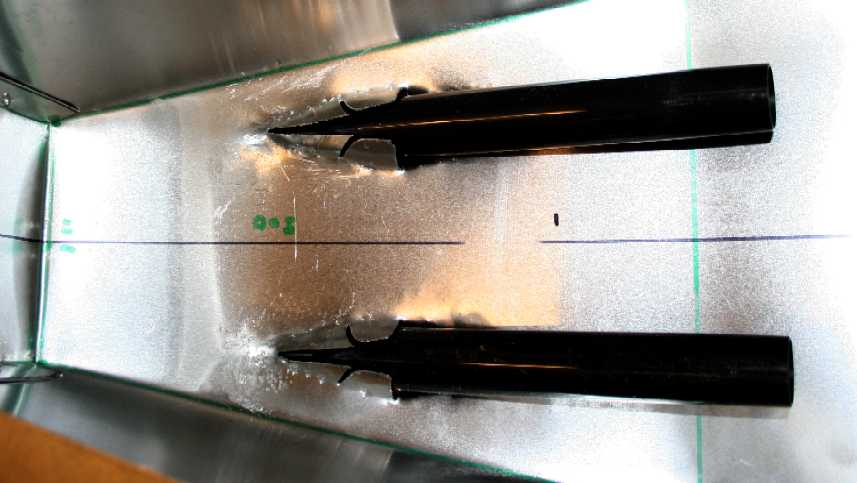
Don't waste metal testing your development for fit, use cardboard as a template.
Look at that, it fits. As we said, paper or cardboard is forgiving, aluminium is not. But at least we know that in theory the exhaust tube will go through the ally hull - and yes, it does look like a jet-drive, thru-hull installation. Because, in a way it is.
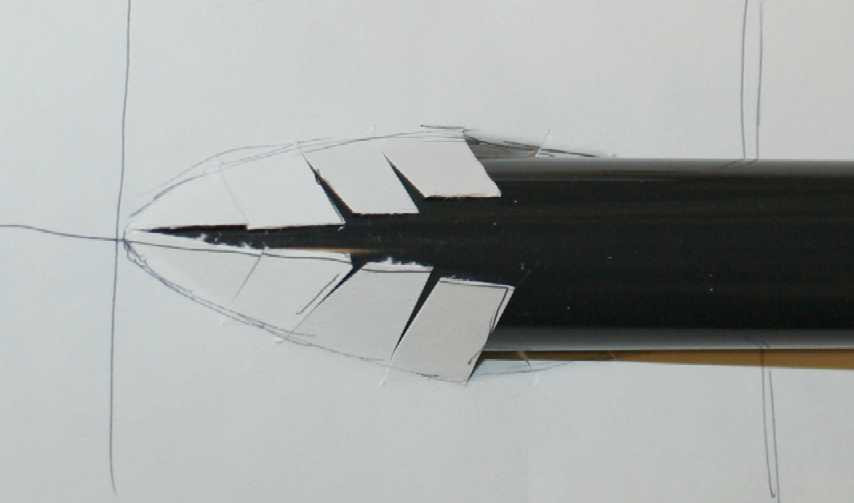
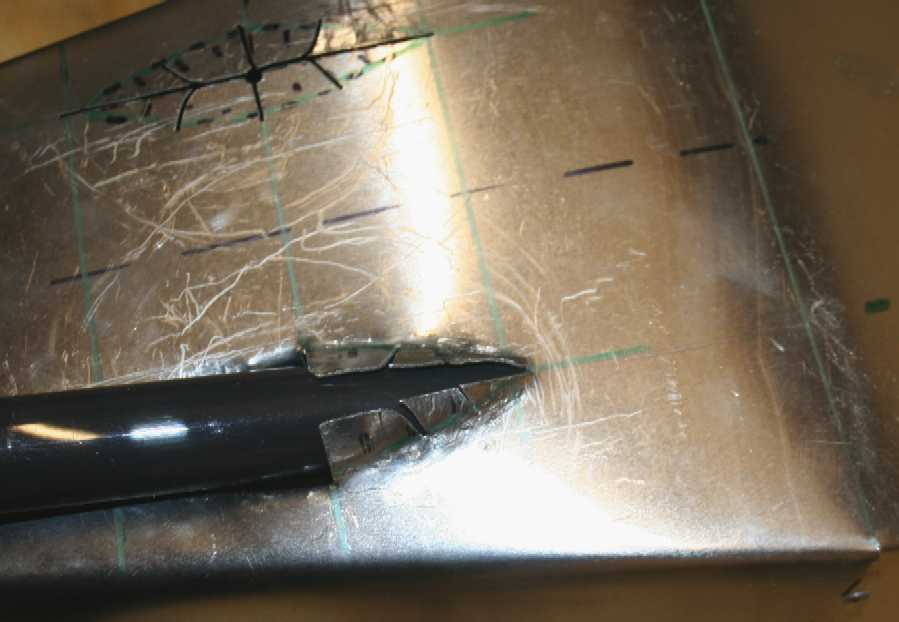
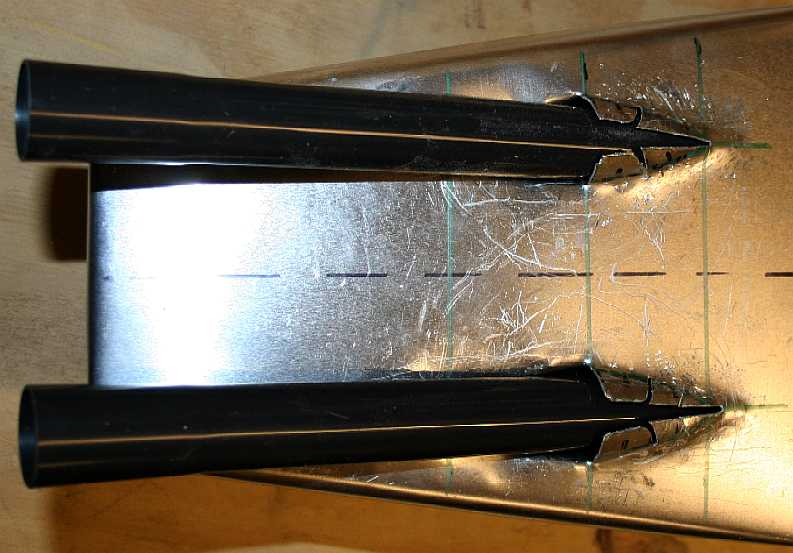
LEFT - Now for the aluminium version. Notice how scratched up the underside of the hull gets from a jigsaw - and this guy sweeps the table before each pass. RIGHT - The inside of the hull is relatively unmarked. The plastic tube passes through okay, but will need some panel beating skills to make the hull a really snug fit to the tube. We don't need to get too precious, because these pipes will be bonded in place. Hence, once the second hull breach is cut, the next aluminium parts to fabricate will be the jet strut (taking the place of a prop-tube strut), which we are thinking to combine with reversing bucket mountings, such that the vessel can maintain station in a particularly thick plastic soup - and just vacuum away. Back to AutoCad for the bucket. Pictures taken 11-2-15.
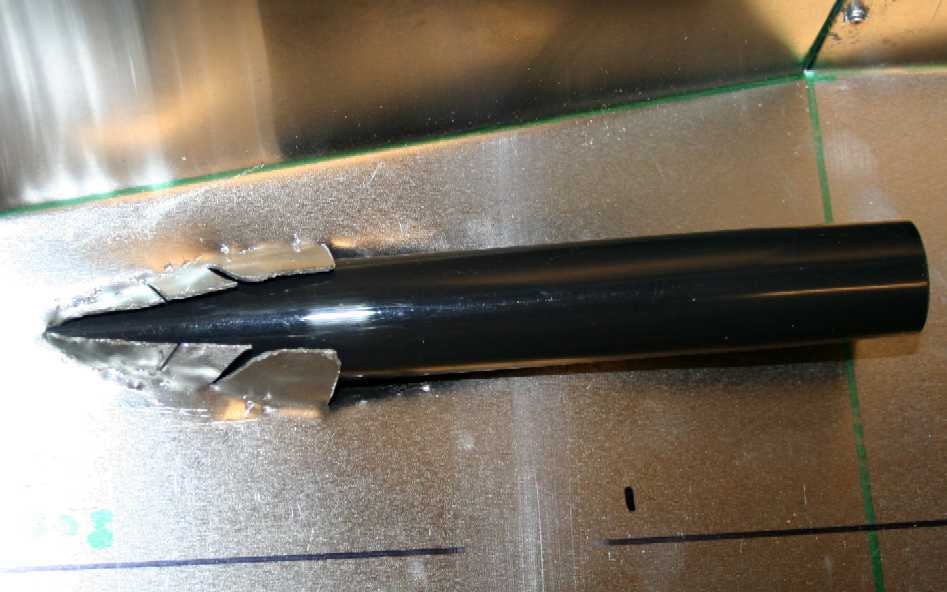
This is where it gets nasty. You can't panel beat, without beating a panel. Don't be afraid to hit the aluminium and making a few marks. It will beat back with some gentle persuasion. Note that we made a tube of ally to work to. Tubes like this could have been welded in, with the plastic tubes passing through. We went with plastic to ally and bonding for speed.
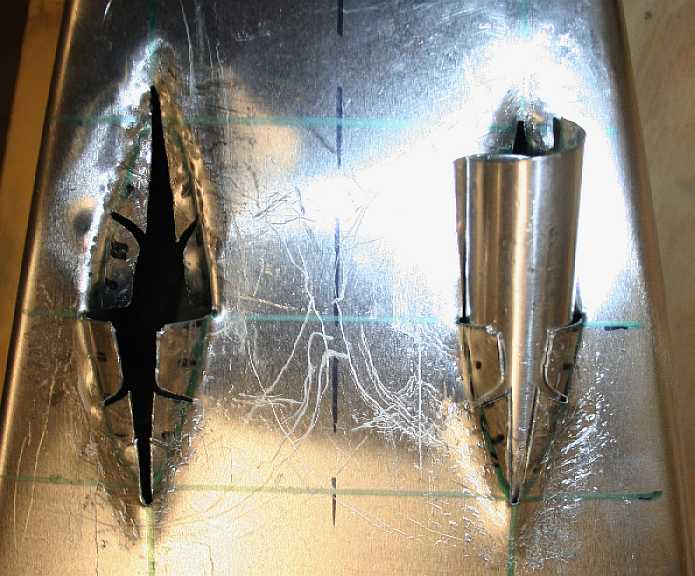
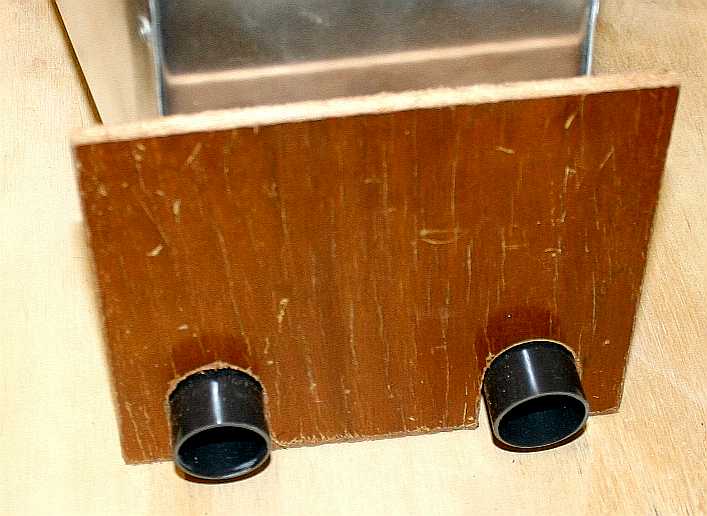
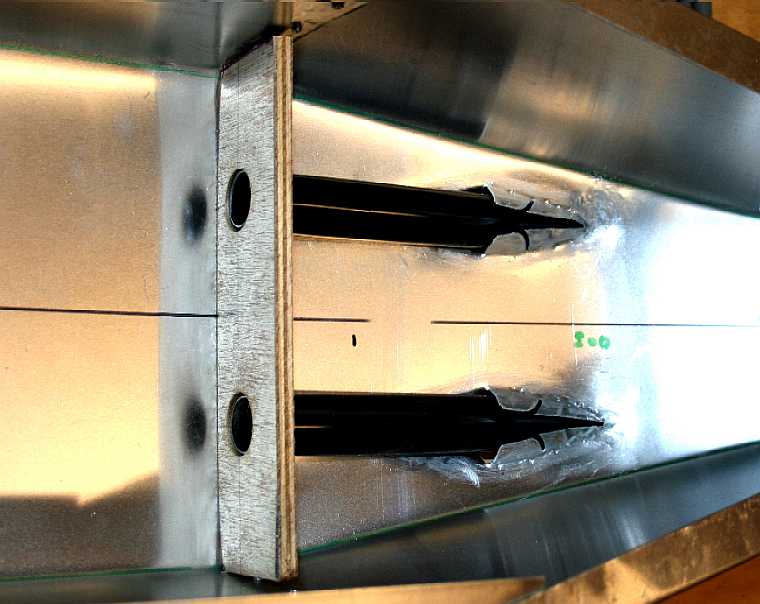
LEFT - Finally, ready for the bonding ceremony - looking at the water exhausts from inside the hull. RIGHT - Looking at the water exhaust tubes from the underside of the hull. They will of course be bonded in parallel to each other - and at 180 degrees to the direction of travel of the vessel, or, in other words, horizontal. The exhaust should be as widely spaced as the hull allows, such as to take advantage of the water jets for steerage. This will reduce the size of any rudders and may remove the need entirely. If that proves to be practical, the drag of the hull will be slightly reduced.
Bonding in the hull stern tubes is not a task one can leave to chance. To be sure the water jets exit at the correct angle, we are using two jigs, one inside and one outside of the aluminium hull. We are using GRP to make the seal for strength. This of course means that the laminating will move the tubes, hence alignment must be assured with measurements. Also, the aluminium has to be roughened up with production paper to give a key, or the GRP will break free at the slightest impact. The bulkhead jigs are taped in place with duct tape, until the GRP sets.
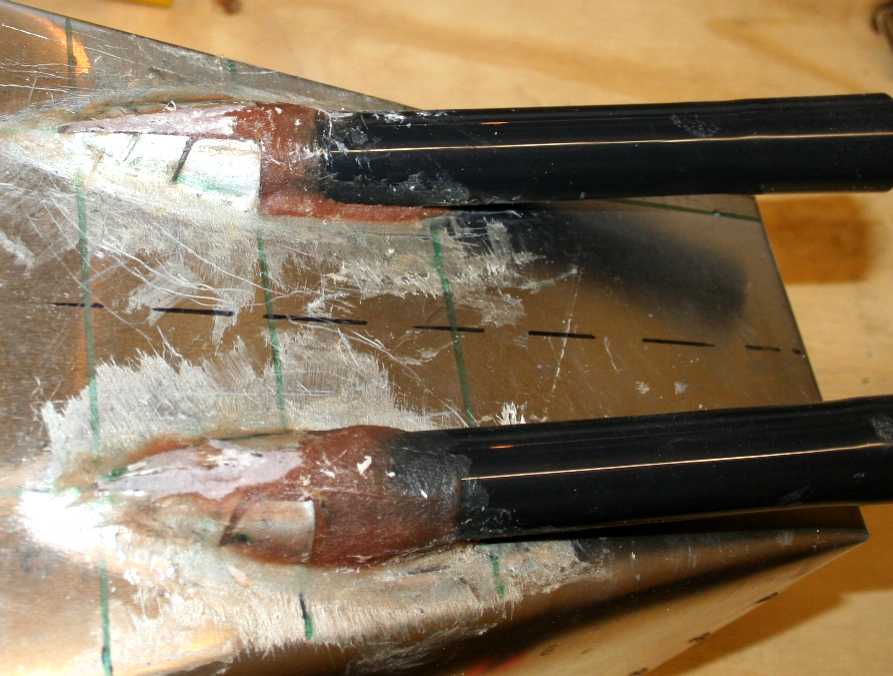
EXIT TUBES - Resin is applied to the inside faces of the aluminium housing, then the tubes are fed through. For this operation we need fine glass tissue and resin paste. Fill the gaps with resin paste, then work the tissue well eliminating any air bubbles with a roller to be sure of a watertight seal. Any irregularities can be removed with a sharp Stanley knife before the resin sets hard. The underside of the hull will be shaped and if necessary, filled, to maintain (as far as possible) a smooth water flow on the hull underside. Working GRP is always messy, especially on one-offs. Clean up with acetone and watch that glass fibers do not get into your skin. The pictures above were taken when partially cured and with the jigs removed.
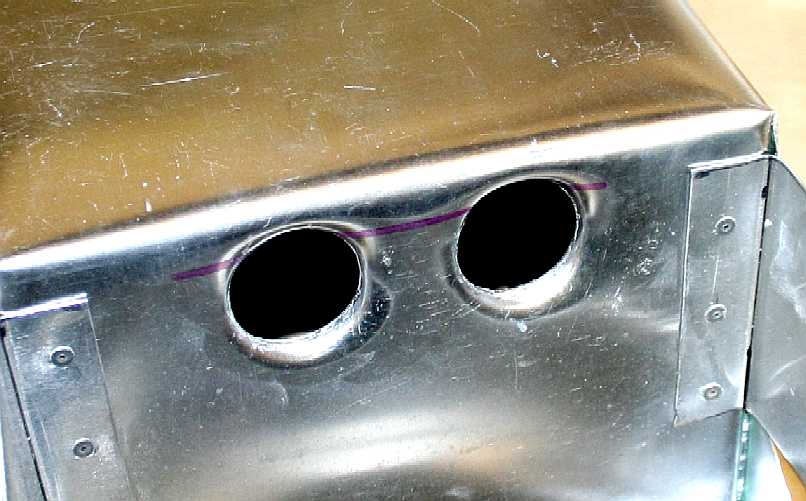
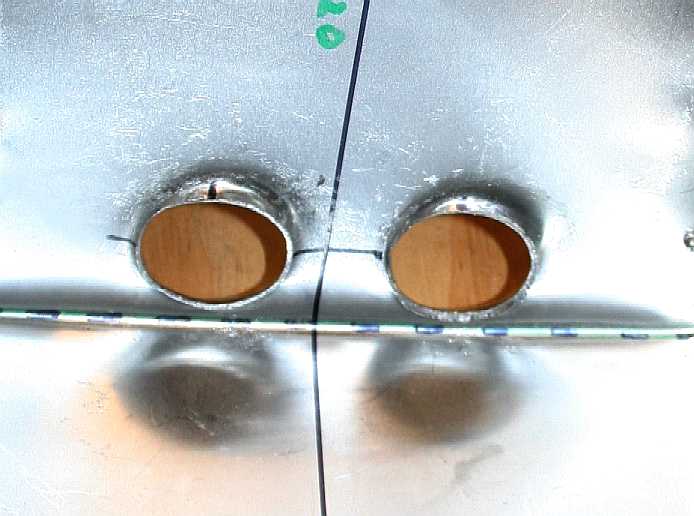
ENTRY TUBES - We needed to make two holes in the front of the rear hull, for the feeds from the dual cyclonic chambers, to the pumps that are inside the hull. These entry holes should be shaped to prevent chafing of the silicone-rubber flexi piping. We also need the join to have sufficient clearance to allow the suction head to change angle for a deeper sweep. You can see from the pictures above that the hull entry holes are low down, and that they have been shaped to give a smooth rim. The piping is an interference fit, but the flexible tubing will be bonded in with a silicone sealant to be on the safe side. Sealing up the hull seams is next. Then the pumps can be fitted.
PAINTING - The Enterprise 1 is shown here with some white primer. To see more about how to we painted this large model boat for under £100, click on the picture above. You may pick up a few tips for your own project.
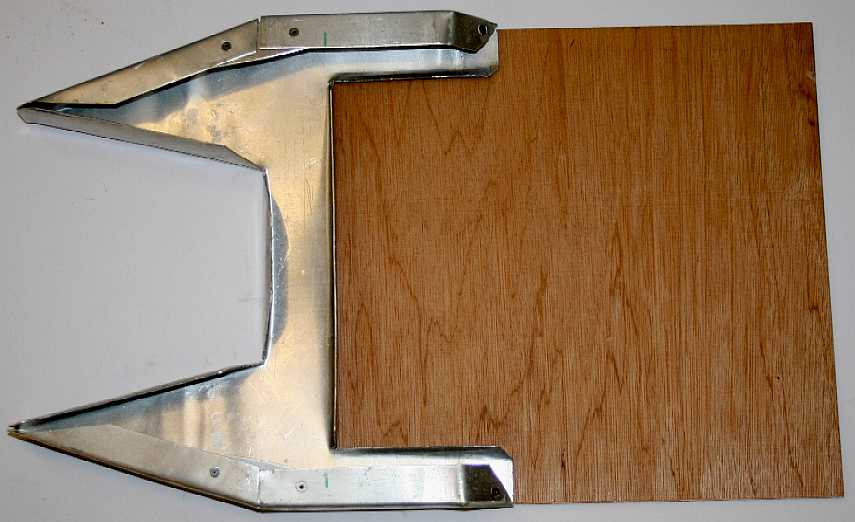
HELIO PAD - Where the US Navy experienced quite a few tips into the sea while their RQ series of helicopter drones were attempting to land on a moving ship, we have designed a landing pad that helps both drone and unmanned aircraft to land as safely as they might. Our ally support frame bolts straight onto the back of the hull of the SeaVax 'proof of concept' model; the marine ply landing deck bolts to the ally frame. The pictures above show our first experimental deck (underside) under construction. The diagram below shows the deck position on the rear of the boat. We will be looking at incorporating electronic/optical guidance methods, such that a drone targets the landing pad, just the same as a modern passenger aircraft can land on a runway without a pilot. This will be a two way information stream, where the feedback helps docking.
ABOUT ALUMINIUM ALLOYS
WEIGHTS & MEASURES TABLES
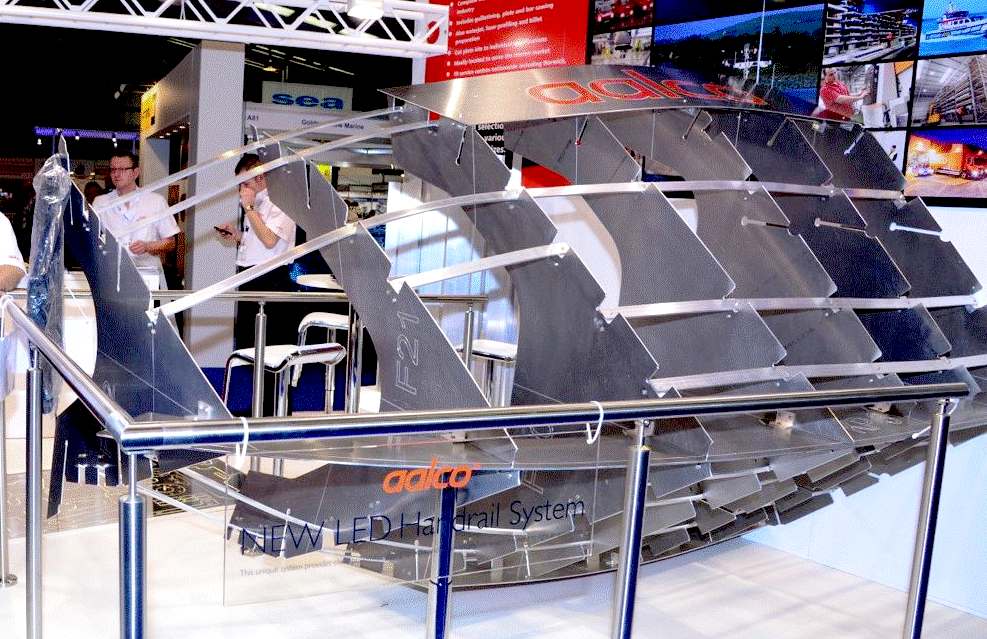
SEAWORK 2013 - Aalco in the UK regularly exhibit at trade shows such as SeaWork.
SHENZHEN WANXINYUAN ALUMINUM INDUSTRY CO LTD 5052/5083/5182/5754/6005/6061/6063/7021/8011,etc.
LINKS
vafusa hydrocyclone separators Vortex depollution products shredders pet bottle perforator http://www.aalco.co.uk/ http://www.ssaltd.net/ http://www.forbes.com/ http://en.nioc.ir/ http://www.saudiaramco.com/ http://www.shell.com/ http://www.rosneft.com/ http://www.exxonmobil.com/ http://www.gazprom.com/ http://www.petrochina.com.cn/ http://www.pemex.com/ http://www.chevron.com/ https://www.kpc.com.kw/ http://www.petrobras.com.br/ http://www.total.com/ https://www.qp.com.qa/ http://www.adnoc.ae/ http://www.bp.com/ http://www.lukoil.com/ http://www.statoil.com/ http://www.pdvsa.com/ http://www.nrc.oil.gov.iq/ http://www.sonatrach.com/ http://www.vortexdepollution.com/products/shredders/shredders/pet32-perforator http://www.forrec.eu/dual-shaft-shredders http://www.machinerydata.com/PlasticLumber.htm http://www.ksb.com/giw-en/ http://www.hydrocyclone.com/ http://en.wikipedia.org/wiki/Hydrocyclone https://www.vafusa.com/hydrocyclone-separators.htm
Youtube
ACIDIFICATION - ADRIATIC - ARCTIC - ATLANTIC - BALTIC - BERING - CARIBBEAN - CORAL - EAST CHINA ENGLISH CH - GOC - GULF MEXICO - INDIAN - IRC - MEDITERRANEAN - NORTH SEA - PACIFIC - PERSIAN GULF - SEA JAPAN STH
CHINA - PLASTIC
- PLANKTON - PLASTIC
OCEANS - SEA
LEVEL RISE - UNCLOS
- UNEP
WOC
- WWF
Our love affair with plastic is choking the oceans. Once people know about it, they want to stop it. But how? The next question is who? Obviously, if any of the researchers involved so far had come up with a solution, they would have sorted it years ago. We are a practical think-tank fresh to the issue and without a budget. We hope to be able to collaborate with other marine organisations that are funded for this work, or who have funds to investigate viable projects. You cannot donate to us directly on this site, but we hope to identify partner sites shortly where you can support a project much like that proposed herein, or better still, our own practical experiments. Volunteer careers.
|
|||||||||||||||||||||||||||||||||||||||||||||||||||||||||||||||||||||||||||||||||||||||||||||||||||||||||||||||||||||||||||||||||||||||||||||||||||||||||||||
|
This website is Copyright © 2015 Bluebird Marine Systems Ltd. The names Bluebird™, Bluefish™, SeaNet™, SeaVax™ and the blue bird and fish in flight logos are trademarks. CONTACTS The color blue is a protected feature of the trademarks.
|